Android Development is moving to Jetpack Compose! This Exodus is necessary because Android Developers can now streamline and accelerate UI development with robust tools and less code. Note that the Official Site for Android Developers recommends the Jetpack Compose toolkit.
However, we can’t ignore the fact that Android Developers signed up to play the game of catch-up with such evolutions. For instance, switching from the Developer Guides Documentation to Jetpack Compose Documentation is hectic. Each technological improvement in this context translates to having to re-learn to benefit from efficiency in the least.
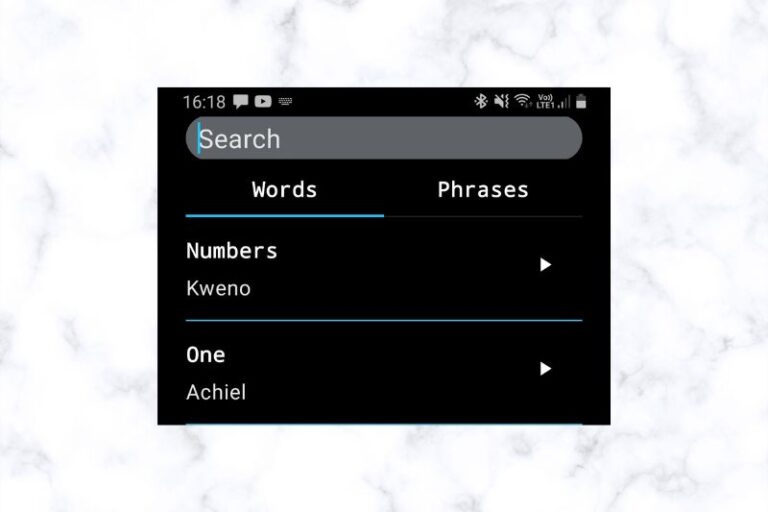
The beauty of it all is the guarantee of always having more to learn and experience technological advancements while it happens. In this article, I’ll walk you through how to make a SearchView in Jetpack Compose. This SearchView will be searching through a list of items.
1. Create a Model
Start with creating a data model as shown below.
data class ExampleModel(
   val exampleString1: String,
   val exampleString2: String
)
2. Create a Data Source From the Model
Next, create a class with one function that uses the data model above to return your data.
class ExampleDataSource {
    fun loadExampleModel(): ArrayList<ExampleModel> {
        return arrayListOf(
            ExampleModel("Example", "One"),
            ExampleModel("Example", "Two"),
            ExampleModel("Example", "Three")
           )
    }
}
3. Create a ViewModel
As a best practice, you need to drive your data from a model. Create a ViewModel that you’ll use with the SearchView as opposed to using the data source directly.
class ExampleViewModel : ViewModel() {
    var _list = MutableLiveData<List<ExampleModel>>()
    val list: LiveData<List<ExampleModel>>
        get() = _list

    init {
        loadExampleModel()
    }

    fun loadExampleModel() {
        _list.postValue(exampleModelListData())
    }

    fun performQuery(query: String) {
        val filteredList = exampleModelListData()
            .filter {
                it.toString().lowercase(Locale.getDefault()).contains(
                    query.lowercase(Locale.getDefault())
                )
            }
        _list.value = filteredList
    }

    fun exampleModelListData(): ArrayList<ExampleModel> {
        return ExampleDataSource().loadExampleModel()
    }
}
4. Create the SearchView
It’s all coming together nicely. At this point, you can create the SearchView.
@Composable
fun SearchView(
    exampleViewModel: ExampleViewModel
) {
    var query by remember { mutableStateOf("") }

    val focusManager = LocalFocusManager.current
    Box(
        modifier = Modifier
            .border(//Put your desired width e.g. width = 1.dp,
                //Put your desired color e.g. color = Color.White,
                //Put your desired shape e.g. shape = Shapes.CircleShape
            ).fillMaxWidth()
            .padding(horizontal = 24.dp)
    ) {
        BasicTextField(
            value = query,
            onValueChange = {
                query = it
                if (it.isNotEmpty()) {
                    exampleViewModel.performQuery(it)
                }
            },
            modifier = Modifier
                .background(//Put your desired color e.g. color = Color.White,
                    //Put your desired shape e.g. shape = Shapes.CircleShape
                ).height(38.dp)
                .fillMaxWidth(),
           textStyle = TextStyle(
                     //Put your desired color e.g. color = Color.Black,
                     //Put deisred fontSize e.g. fontSize = 18.sp
                ),
                singleLine = true,
            keyboardOptions = KeyboardOptions(keyboardType = KeyboardType.Text),
                maxLines = 1,
                decorationBox = {
                    Row(
                        verticalAlignment = Alignment.CenterVertically,
                        modifier = Modifier
                            .padding(horizontal = 10.dp)
                    ) {
                        Box(
                            modifier = Modifier.weight(1f),
                            contentAlignment = Alignment.CenterStart
                        ) {
                            if (query.isEmpty()) Text(
                                "Search",
                              //Put your desired color e.g. color = Color.White)
                                it()
                        }
                        if (query.isNotEmpty()) {
                            IconButton(
                                onClick = {
                                    query = ""
                                    focusManager.clearFocus()
                                    exampleViewModel.performQuery(query)
                                }
                            ) {
                                Icon(
                                    imageVector = Icons.Default.Close,
                                    contentDescription = "Clear Icon",
                                    tint = Color.Black //Or desired color
                                )
                            }
                        }
                    }
                }
            )
    }
}
5. Create a ListItem
The SearchView searches through a list of items, so you should create one based on the ExampleModel above.
@Composable
fun ExampleListItem(
    exampleModelItem: ExampleModel,
    modifier: Modifier = Modifier
) {
    Surface(
        modifier
            .padding(vertical = 8.dp, horizontal = 8.dp)
            .clip(MaterialTheme.shapes.medium)
    ) {
        Row(modifier.padding(vertical = 8.dp, horizontal = 16.dp)) {
            Column(modifier.weight(1f)) {
                Text(
                    text = exampleModelItem.exampleString1,
                    // Put desired style and color as per below comments
                    //style = MaterialTheme.typography.body2,
                    //color = MaterialTheme.colors.onPrimary
                )
                Spacer(modifier.padding(4.dp))
                Text(
                    text = exampleModelItem.exampleString2,
                    // Put desired style and color as per below comments
                    //style = MaterialTheme.typography.subtitle1,
                    //color = MaterialTheme.colors.secondaryVariant
                )
            }
        }
    }
}
6. Create a List From the ListItem
The ListItems will exist in a List as per the example below.
@Composable
fun ExampleWordsList(exampleViewModel: ExampleViewModel) {
    val exampleModelList = exampleViewModel.list.observeAsState().value
    LazyColumn {
        if (!exampleModelList.isNullOrEmpty()) {
            items(exampleModelList) { exampleModelItem ->
                ExampleListItem(exampleModelItem)
                Surface(Modifier.padding(horizontal = 24.dp)) {
                    Divider(
                     // Put desired thickness and color as per below comments
                    // color = MaterialTheme.colors.onSurface, thickness = 1.dp,
                    )
                }
            }
        }
    }
}
7. Bring It All Together
Finally, bring all these steps together via a TopBar and its content.
@Composable
fun ExampleDisplayScreen() {
    val exampleViewModel: ExampleViewModel = viewModel()
    Scaffold(topBar = {
        SearchView(exampleViewModel)
    }) { padding ->
        Column(modifier = Modifier.padding(padding)) {
            ExampleWordsList(exampleViewModel)
        }
    }
}
That’s it! If you are getting started, Android is moving from Android Basics in Kotlin to Android Basics with Compose. These tutorials will give you a clear view of what else is left to learn in Jetpack Compose. Happy coding!

